Showing posts with label 3rd Grade Art. Show all posts

Wednesday, February 24, 2016

Sub didn't show

Every once in a while, we run into the unfortunate situation where a substitute teacher cancels a job for some reason. When they do this on short notice, we have to split classes or cover for that teacher. In this instance, I had a class and 1/2 come to art. What to do with 30 3rd graders? We have been working on landscapes, so we created these mini beauties to demonstrate Foreground, Middleground and Background. Cray Pas were used for sky and details. 


Wednesday, November 19, 2014

Masks 3rd Grade

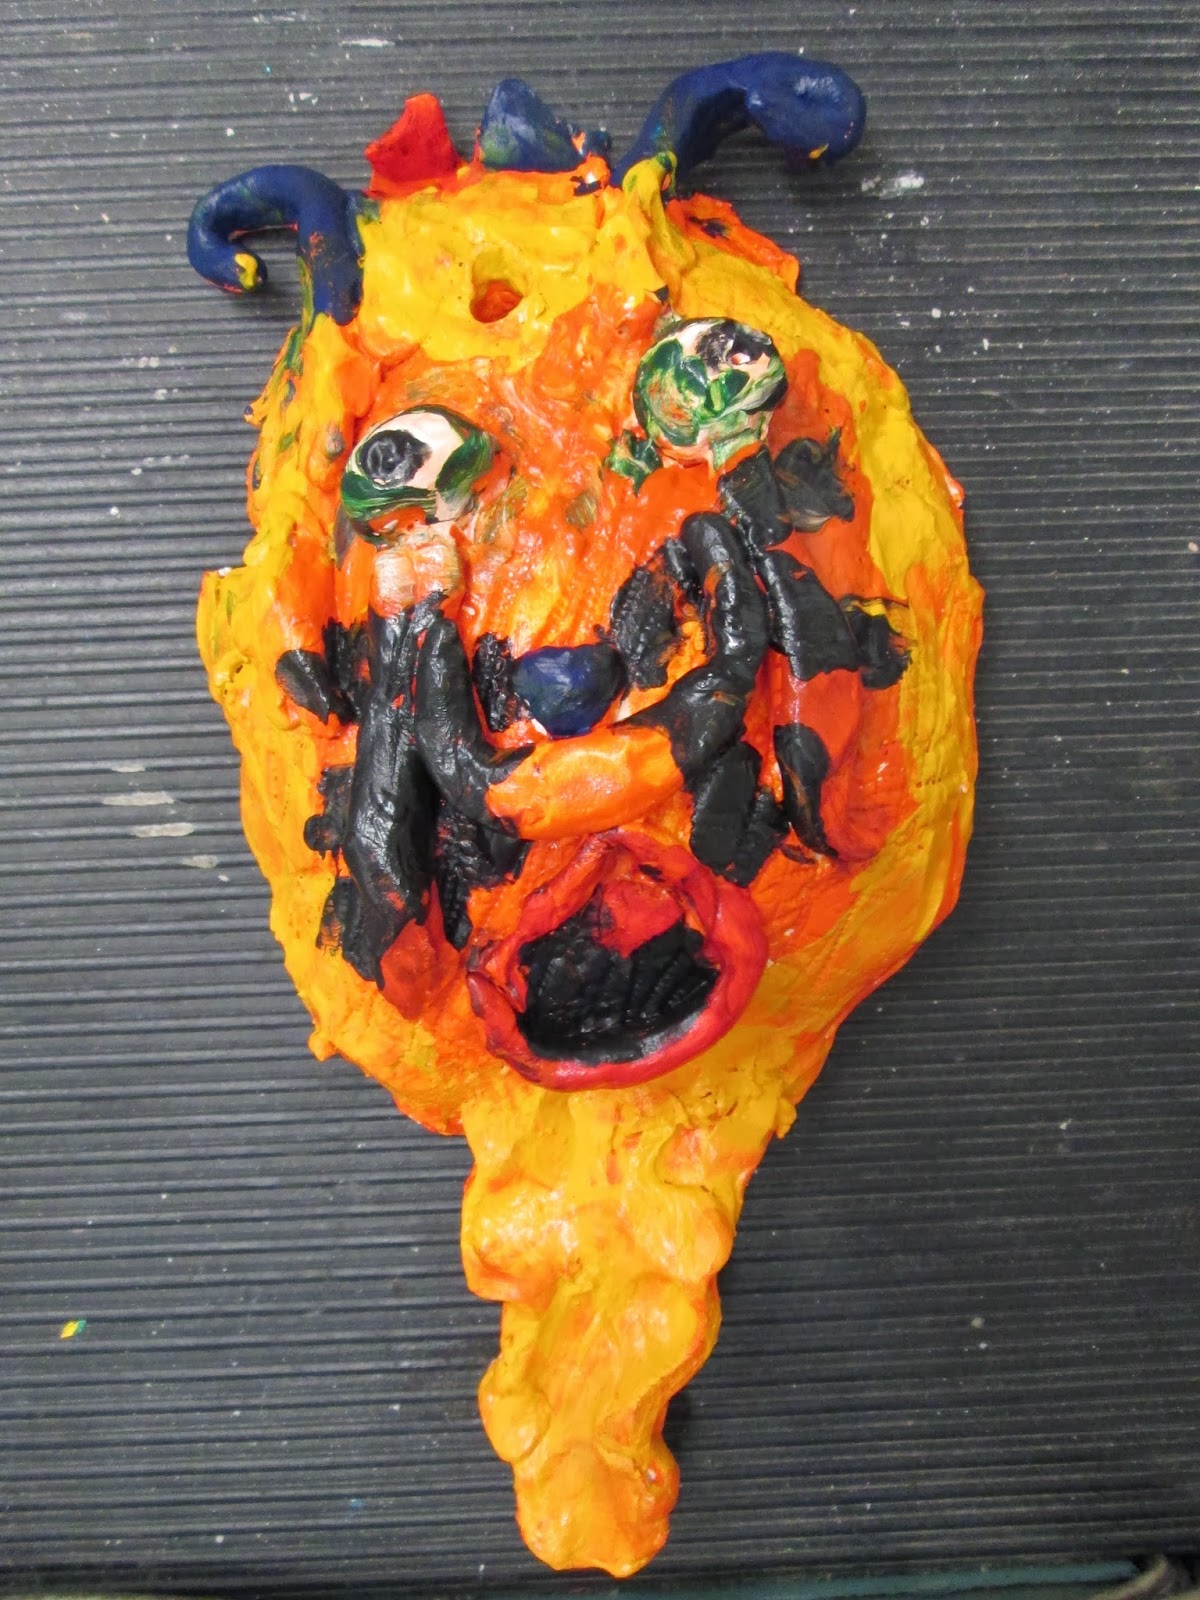
Every year, I teach a mask unit to the 3rd graders.  It's one of my faves.  There is a lot of buy in from the kids- they are so excited when I drop the word clay- and they'll do just about anything I ask, knowing that mask making is upon us.  In various years, I've presented a variety of themes; this year, my theme was... no theme.  Yep, I didn't make any requirements such as animal theme, or Day of the Dead Skulls- no requirement other than they had to choose a feeling, or a main idea, and their work would support their idea by shape, color, texture, etc.  A lot of choice.  We did practice sketches, talked about various ways they might approach this, and looked at a lot of masks, discussing the first reaction those masks gave us.  When it was time to paint, I again offered choice.  One side of the room was reserved for acrylic paint, the other for the oil pastel/black paint resist technique floating around pinterest lately.  And, finally, I had wire, pipe cleaners, feathers, beads and sparkles available. 


Thoughts?  I am fried.  This was a lot to manage.  It's not for the faint of heart. 
Did all students succeed?  Well- hmmm.  Not all of the masks were pretty, or well done.  Many students should have spent more time on their painting (but that's usually the case).  BUT- my kids are delighted. They love their creations.  They were so excited to take them home, and I didn't settle one argument about who did which mask.  They simply knew their work- they were attached.  And dying to see their masks at every stage.  There's a lot to be said for that. 
Will I do this level of choice all the time?  I'm not sure.  Will I increase the opportunities for choice?  You bet!


Tuesday, October 21, 2014

Kandinsky inspired art projects

Here in Nashville, it is Artober- a monthlong celebration of all things arty around town.  It's a lot of fun.  In our schools, we chose Wassily Kandinsky as a focus artist (he has an AMAZING retrospective exhibit at The Frist Center for the Visual Arts right now).  Here are some of my 3rd and 4th grade responses to his work. 

3rd Grade- we used Kandinsky's concentric circles as inspiration to create these amazing circle weavings.   I have the students plug the hole in the middle with a button for a couple of reasons.  It's cute.  Also, the center of the weaving is often filled with the most mistakes, since it's the beginning, and by the time we get to the edges, the kiddos are much better weavers.  It's a nice way to finish it.  I hot glued the weavings to mat board, and had the kids decorate the edges with colored sharpies.  It allowed for some element of choice in a pretty regimented project.


4th Grade- Little more complicated.  We looked at a variety of Kandinsky's landscapes from the more realistic to the mostly abstract, discussing how lines and colors can represent a feeling or an object.  I played Vivaldi's 4 seasons, and students sketched lines to each seasonal song.  From there, students created a circle, and divided it into 4 sections, and each section was to represent a season.  I had them use cray-pas to color, and we attempted some blending with baby oil.  This was hard.  Some had a difficult time with the idea of blending.  They wanted to just keep mixing the colors.  Others just colored as usual and put oil on top.  It proved to be a difficult concept that I'm going to have to keep working on.  But, in the end, there were some really great attempts.  Abstract was also a hard concept to teach to the students, I acknowledged that our brains naturally want to "file" everything we see into a definite category; we want to know what something is. And, we just kept trying and adapting.


Wednesday, February 5, 2014

Olympic Action Prints

It's a messy time in the art room- one of my favorite things is printmaking!  The kids love it, and with an organized set up and routine, it does not have to be a crazy mess.  Since we've been using The Olympics as a theme in 3rd grade art, after the kids made their statues, I had them make an incised plate on a piece of Styrofoam.  I go ahead and buy the trays through the art catalog.  They can be pricy, but they work.  And to save a bit, I chop 'em in half.  When I'm feeling really cheap, I save them after the projects to use as paint trays and such.  That aside- each student drew one person, in an olympic pose.  Then, we broke out the red, white and blue- except I didn't have as much white as I thought, so we ended up using white paper for those that wanted the Americana effect.  Curriculum states in MNPS that the 3rd graders will do a collograph print.  And, this is incised.  I intend to have them collograph a background image- I've never done a double print project, and I'm not sure how it will turn out, but ya never know until you give it a go.  So, here's step one.  And, hopefully, the next thing you'll see is a double print posting.


Tuesday, January 28, 2014

Olympic Athletes

I LOVE using the Olympics as a theme in the art room. There are so many connections, the most logical for me being the action- the kids love sports, and it's a great chance to work on those people.  The 3rd graders explored the Olympic Website with me, chose a sport, and filled out a think sheet about their choices.  Then, I taught them to make "pipe cleaner people".  These served as our armature.  We covered them in old tape, and put paper mache' on top of that.  It was a sticky mess, and some of our athletes needed to be propped up with wooden blocks.  But, despite the awkward phase, the paint day today really made them come alive.  I had the students attach their athlete sculptures to a wooden  block (I have an old bunch of wood building blocks in the art room that I've been itching to recycle) and this allowed all athletes to stand proud. We will transition to printmaking after this- using the students' chosen sport as the subject.


Sunday, November 24, 2013

Magazine Turkeys and a little Mask

My Kindergarteners are proving a bit needy of some cutting and gluing practice (as well as some basic listening/direction following skills), so I channeled the Turkey Day energy that's been buzzin' for this project.  It started with just basic cutting/gluing to create the body, wings, feet and beaks.  I had the brown and orange paper pre-cut, and they followed along with me.  For the feathers, I pre-sized some magazine pages into manageable pieces.  They used those to create feathers.  I encouraged ovals, but some got a bit rectangular.  The kiddos seemed to really enjoy this project- especially the ones who got cartoon scraps. 


 Also, my 3rd Graders have been working on clay masks and I just had to share.  Below, one student begins the painting process.  (I use acrylic- it's messy danger, but it looks great on clay!)  The other is by a boy who clearly loves making masks.  It's so rewarding when you finally find the thing that excites a hesitant student!  When we paint, I set up paint stations.  The kids move their mask to the station, rather than me pouring paint for every table that may or may not be used.  I have a student with Autism, and traveling is not in her best interest- I allowed her to stay at her seat with color choices.


Monday, November 18, 2013

Sculptural Faces

The 3rd Graders and I are in the midst of mask making!  Admittedly, one of my favorite units to teach.  We have made clay masks (which are going to be painted soon) and are currently working on Echo Masks.  While working through the clay days (sick kiddos=more make up days than I like.  It seems like the clay dust is never ending), I gave each student a piece of card stock and some scrap paper.  They were to use their paper sculpting skills to create an outrageous face- the sillier the better.  I demonstrated/reviewed the techniques I know they should be capable of (having had the majority of them since Kindergarten) and then I turned them loose.  After they finished, I took them outside and spray painted them.  Here are the results!


Saturday, September 28, 2013

End of the 9 Weeks

I am wrapping up the 1st 9 weeks of school (already?!?).  Here are some projects I'm doing with my students.  I find that the end of the 9 weeks is a great time to squeeze in some of those seasonal, or craftier projects that the kids love, and review some of the skills that may be a little lacking.  My students are a bit lacking in their craftsmanship- especially their cutting and gluing, so the more chances I have to review, the better.

Torn Paper Seascape- 3rd Grade

A watercolor wash for the sky, and torn paper for the sandy beaches and waves.


Owls- 1st Grade.  Combo of torn paper and cutting


Taken from the "Spectra" art series-the 1st teacher manuals MNPS ever provided. They were scripted, and came with slides.  But, there were a few projects in there that I still like to revisit.

Tuesday, September 24, 2013

Monster Mash

I see my kiddos 1 hour every three days.  That is an amazing amount of time- I am really blessed.  My deal with the kids is that we get the "have to" work done first- everything that MNPS says I'm supposed to cover in the 9 weeks.  If we have leftover time (and we usually do) we can do the craftier, more seasonal projects that the kids don't get a chance to do in their classroom anymore.  And, if I can review a few skills along the way,  the kids don't need to know about that.  I came across this on Pinterest, and had just happened to be working on facial proportion with the 3rd graders.  It was a good fit, as we were able to discuss why artists like Picasso might alter the proportion of the face.  After a quick run down of Cubism basics, we got out the construction paper, and created these cubist Frankensteins.  I told the kids that they were like the mad scientist.  This was a one day project with 3rd grade- and my goal was to get them thinking about their cutting and gluing.  They had a blast, and these are going to be a lot of fun in the hallway in October.  (Side note- I don't know about you, but I have to be very careful in how I present seasonal projects.  I did not present this as a Halloween project, rather as a Monster.  The kids brought up the idea of Halloween, but it was not something that I pushed.


)

Thursday, March 14, 2013

Art Show

4th Grade- Cat Paintings and Clay Facades

3rd Grade- Word Art

Kindergarten-Birds on a Wire

2nd Grade- Bird Houses

1st Grade- Heart Weaving

Sign in, Summer Art Program brochures, and Artsonia Updates.

Cookies and punch- I brought in my nice plate and punch bowl-if I'm throwing a party, I try to do it right.
The music teacher and I decided to take back Youth Art Month this year.  He did his 1st and 2nd grade program, and I did the school art show.  We planned the event as one big "Arts" night.  Mixed feelings- We had a good turn out, but many parents did not bring their older kids, because they did not have a child in the program.  I did get a chance to talk to a lot of parents, and get some updated emails for my Artsonia page.  I like the idea of the arts night, but will have to think about how to entice parents in all grade levels to come, and not just because they are killing time waiting for the program.  Good thing I have a year to puzzle this out.

Tuesday, March 12, 2013

Slang Terms/Robert Indiana

I showed my 3rd graders the famous "LOVE" print by Robert Indiana, as we were talking about lettering, and word art.  We then generated a list of popular "Slang" terms that we use today- which also got us into a talk about texting shorthand.  From there, I asked students to pick a word or term that was 4 letters or less.  ( I promised them they'd appreciate my limiting them later).  After learning about block lettering, each student created the letters they'd use to spell their term, and drew/colored patterns inside each one (side note- I learned that some students colored/designed the negative space of their block letters- not sure if this is a right brain vs left brain thing?)  Anyway, after the designing was done, we took a break, and made our backgrounds using the simple tissue paper/starch collage method.  An oldie, but a goodie.  While the papers dried, we cut out our letters.  Then, we arranged them and stuck them on the background.  Now, some students were very quick, and able get their letters on the paper while it was still wet.  We still needed glue, but I found that they glued flatter.  The next step was to trace the letters with black string, for contrast.  Finally the students wrote other words with the same meaning around the negative space left from their words.  This project was done in many steps- it took a full day for the block letters/designs, another for the background/finishing of the letters, and still another for the yarn and the sharpie words.  And, I did have them make a list of their words before putting them on the project, to reduce spelling issues. There was a moment in the middle of this that I wondered what we had gotten into, but in the end, the kids loved the graphic nature of the letters, and I loved the relevance to their everyday life.  We had a great conversation about words we use with our friends vs words we use with our teachers, bosses, etc.  I had hoped that they would divide the colors between the letters and the background with warm and cool colors- and we worked on it, but in the end, the marker temptation was too great, and they just could not limit their colors. I am hanging these for our upcoming Art Show on Thursday, and just love as the other grades walk by wondering why they never do cool projects like this.