Showing posts with label 1st grade. Show all posts
Tuesday, January 22, 2013
Self Portraits with Expression
I am in the middle of a unit on Facial Expression/Emotion with my 1st graders. We modeled and drew facial expressions, we made "Angry Bird" pinch pots, and we just finished up our Self Portraits. I gave them a full paper (12x18) and instructed them on a head and shoulders portrait. It was of course to look like them, since it was a self-portrait, and they had to use their facial expression to show one of the feelings we'd been talking about. I let them paint with tempera cakes, and we outlined with marker after, which gave them a clearer, more finished look.
Saturday, February 25, 2012
Action Drawings (1st Grade)
![]() |
| This one loved the action lines |
Labels:
1st grade,
action,
drawing,
Keith Haring,
marker
Monday, February 20, 2012
Keith Haring Action People
This past week was Jump Rope for Heart, and I usually try to do some sort of activity that relates- something where we look at action. And, in my really good years, I make it down the hall to hang the pics around the PE room. This year, I brought in the work of Keith Haring, and the 1st graders and I talked about contrast, along with action. The students were in love with his bright colorful images, and had a lot of fun with his work. We each drew and cut a large shape of a person in action. After a review of contrast, students chose a color that would help their person stand out, and glued it down. The extra fun was black glue to trace and add action lines. After this project, we began to work on our drawing of people, and I'll post those fun pics soon.
Labels:
1st grade,
action,
black glue,
contrasting colors,
Elementary Art,
Keith Haring
Thursday, February 9, 2012
Cupcakes
I saw these clay cupcake things on "Art for 1170" and fell in love with the idea. There are only so many years one can teach the pinch pot without needing to switch it up. In other years, I've taught the kids to add handles, feet, lids. One year, I did kind of a Greek Art thing, and we stained the pinch pots rather than glazing or painting. But, seeing the cupcakes, I just had to try it. I bought the mini tart pans at Bed Bath and Beyond for about 79 cents each. But, with the 20% off coupon, it wasn't so bad. Plus, I knew that I would keep them for years to come. I have to work on how to present this lesson- but basically, we put a slab of clay into the pie pans, and pinched it around. Set it aside, and worked on Pinch Pots. After making a successful pinch pot, students shaped it until it would cover the opening on the pie pan. Then, we crammed newspaper (which I had pre-cut to be more manageable) into the pinch pot. I had students lay one piece of newspaper on top of the pie pan, then set their muffin top on top. This was a hard concept, and so far, 2 cupcakes are forever sealed because the kiddos didn't understand, and I didn't figure that out in time to fix it. Whatever clay was left over was used to roll icing, make sprinkles, chocolate chips, or the ever popular cherry on top. This week, we painted our cupcakes. I just used tempera cakes, with a layer of Acrylic Medium over the top. And, they are cute. Next time though, I'm going to have the students "dunk" the bottoms into a thinned down paint/water solution, and only use brushes to paint the top- hoping that way, the paint job is smoother. When we do clay animals, we "dunk" first, then paint details, and it works really well. I brought in my cake plate, and my librarian friend has loaned me her cupcake stand so we can display them.
Labels:
1st grade,
ceramics,
clay cupcakes,
Elementary Art,
sculpture
Saturday, February 4, 2012
Animal Prints/Cupcake Prints
| After the gluing, pre-printing |
| This student moved, but I used his plate as an example, and sent his print to the new school. |
| Creative Drying Space |
| Many students thought of an animal that could utilize a hole puncher. |
| Cupcakes everywhere |
I have 2 printmaking classes going at once. Not sure if it's a rookie mistake that I should have known to avoid, or if it's the crashing of the curriculum. I see my kids every 3 days, so I'm sure the other teachers in the district who only see their students once a week are pacing their lessons differently. Nonetheless, we are having a fabulous messy time in the new art room-and I've had to get a little creative to find the space for prints to dry. My 1st graders have been working on "Humor" and using the work of Thiebaud as their inspiration, so we made cupcake prints by carving into Styrofoam. The 3rd graders have been looking using animals as our inspiration. Their theme this 9 weeks has been Journey-I am trying to encourage them to learn from their mistakes, and push themselves to be their best, despite their perceived limitations. We've been looking at Monet and Van Gogh, along with other artists. They created collograph printing plates by cutting and gluing tag board. I always try to have the students spread a thin layer of glue with their finger over the collograph plates, as I think it helps the pieces stick, and it provides a smoother surface for the ink. I think the 3rd graders made some great animals.
Wednesday, October 26, 2011
Continuing the Owls
So, my 1st graders had so much fun making the owl sculptures from a post or two ago, that I decided to continue with Owls. We have this awesome site called Pebble Go, where information about specific animals is available. They have short, interesting facts, clear pictures, and also, often have video and sound of the animal. We "researched" owls, and I showed them a variety of owl species. Then, they used black paper (cause owls are nocturnal) and cray-pas. I told them they could be as creative with color as they wanted, but it had to look like an owl. So cute.
Monday, October 10, 2011
1st Grade is a HOOT this fall
If you follow Mr. E's blog, you know that he posted about TP owls that we did at a teacher in-service in August. Fun project. I modified it a bit for my 1st graders- I haven't saved up enough TP tubes, and I don't have the storage right now, so we just glued a paper roll. But, the kids had a blast, and it was a fun project today. We learned some sculptural skills, like balance in the creation of these owls.
Saturday, September 17, 2011
Texture City
| Some struggled with building placement... |
| Love the personality in this one- |
I had the students use texture rubbings from a previous session to create buildings. We added a street as well, and in order to bring home the idea of foreground, middle ground and background, we used little foam squares to "pop out" the cars and people in the front. Big Fun!
Tuesday, March 29, 2011
Dragons
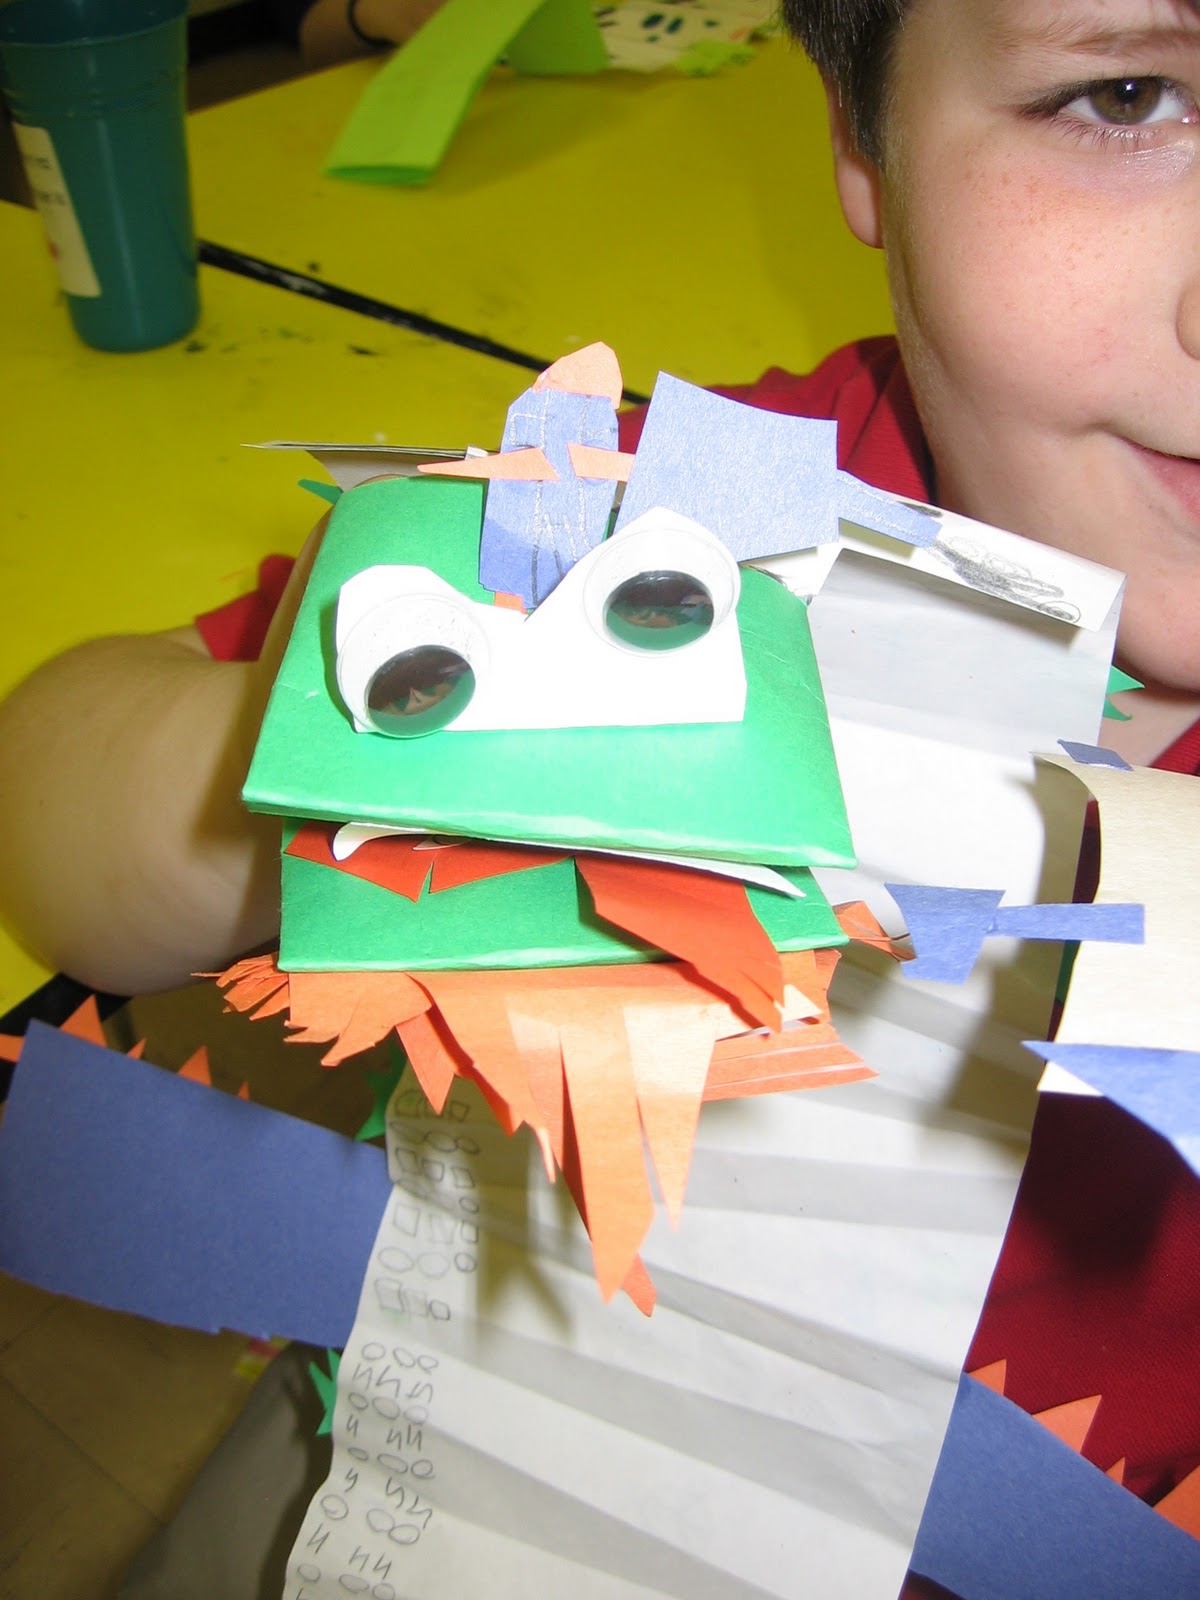
The 1st graders and I have had a great time reviewing some art room basics, like patterns, cutting, paper sculpture techniques, and marker use. And, it is all jammed into one really fun project...Dragons. We drew and colored patterns all over a long strip of paper which we would then accordion fold and use for the body. A green paper was cut into a tail, and a black marker used to create a line design on the tail. The head was a project in itself, as it was a folded puppet head which we then embellished with paper sculpture techniques. Eyes, mouth, hair, horns, teeth, etc. Fire, tongues, and other details were strongly encouraged by me. We used green scraps from the tail paper to cut out feet. And, while they finished on the last working day, I put straws on the tail so that one hand works the head and the other works the tail. The students were beyond happy with their paper dragon puppets.
Friday, November 19, 2010
Turkey Talk
My first graders and I "researched" turkeys, and made practice sketches. After choosing their best/favorite one, they drew it bigger, and traced it with a sharpie. I gave them water color crayons and let them paint in their turkeys. While they worked, I asked them questions about turkeys, and took notes. It made a great thanksgiving project while slipping in skills we'd have to cover anyway. Just love to hide the learning in there amidst the fun.
Monday, April 26, 2010
Animals in their Habitats
Tiger in the water
Tiger in the Cave
This is about the cutest penguin ever!

Giraffe, and Elephant in the pond!
Looking to buy myself a little time while we waited for the clay animals to come out of the Kiln, I had the students make environments for their animals. We discussed Background, Middle Ground and Foreground, along with 2-D vs 3-D. It was a great review, and the kids always love getting out the scrap box. Each student created an environment that they thought would make their animal comfortable. When the animals came out of the kiln, we dunked them in a watered down acrylic paint, to give an all over wash. Then, we used paint on tiny brushes to add the details.
Subscribe to:
Posts (Atom)